


Keep your bike safe and smooth-running
One of the most overlooked aspects of cycling is the maintenance that your bike requires to keep it in tip-top condition. I suggest doing the checks the day before you plan to go for a ride. Nothing worse than getting ready to head out and finding that there is something wrong with your bike.
Although it can seem like a pain in the %&@, learning these essential bike maintenance tips will help you to keep your bike trail/road ready. You’ll begin to understand how your bike works, be able to perform basic repairs and adjustments as well as determine when components require servicing or replacing.
It’s worth getting your local bike shop to service your bike periodically, but it will also benefit from some regular care and attention to keep it running smoothly.
If you’re looking to start cycling, these tips will help you save money in the long run, increasing the life of your bike and avoiding some costly repair jobs.
Nobody wants to end up stranded on the road or trailside and even the most seasoned of cyclists may have reason to call on these tips one day, whether it’s to fix a flat tire or a broken chain.
In this guide, we’ll explain the essential bike maintenance tips for those with little or no experience fixing bikes, as well as the tools you’ll need to keep your bike running smoothly.
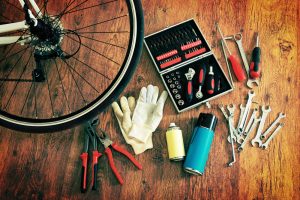
Make sure you have the right tools
You don’t need everything immediately, but there are some essential tools you should get to keep your bike running smoothly.
Having the right tools to fix your bike is the first step on your bicycle maintenance journey.
Some bike maintenance jobs can be done with everyday tools while other tasks require specialty tools.
Always invest in higher-quality tools to make your maintenance as painless as possible and minimize the risk of doing more damage to your bike.
Multi-tools will serve you well when you’re out on a ride and for performing basic adjustments at home, but they lack the leverage needed for some tasks. It’s ultimately best to invest in a quality set of hex keys (allen wrenches) for home use.
Another option is to buy a bike tool kit. These will contain a majority of tools you’ll need, although there may be some you’ll need to buy separately, such as a torque wrench.
Here’s a list of the tools you need when first starting out:
- Multi-tool
- Bike pump (both a track pump to use at home and a mini-pump in case you puncture on a ride)
- Tire levers
- Puncture repair kit
- A set of good-quality hex keys (allen wrenches)
- Torque wrench (critical if your bike uses carbon components, but we’d recommend this tool for all bikes)
- Chain breaker tool
- Chain checker
- Shock pump (if you’ve bought a bike with an adjustable air fork or air shock)
Perform an M-check
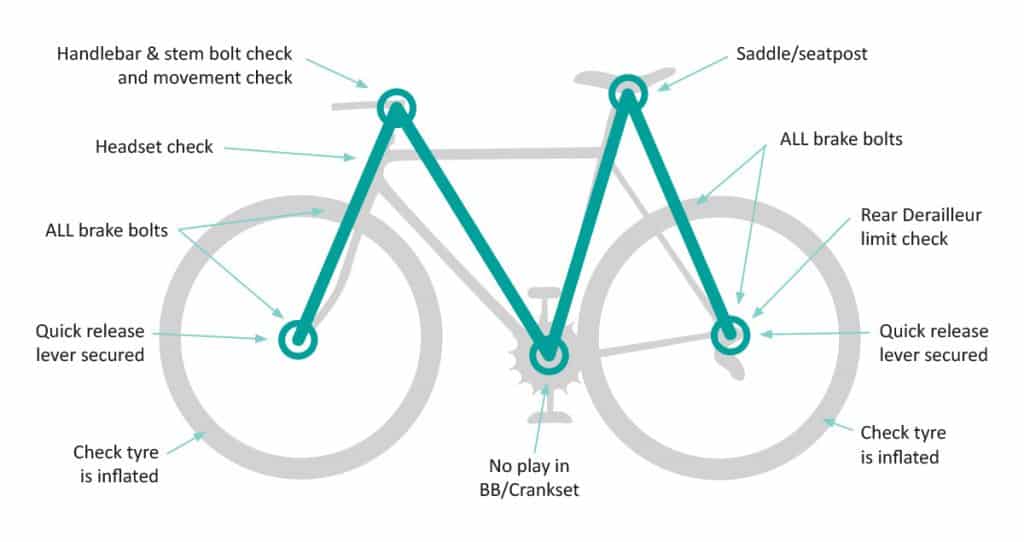
The M-check is a basic bike safety check that looks at the main components of the bike and it gets its name because of the way it progresses along the bike. It’s always good to carry out checks in a methodical way so you do not forget to check an item.
If you haven’t ridden the bike in a while or are buying a used bike, this check can also alert you to any major mechanical problems.
Check your bike in 11 steps
Rear wheel – It should be tightly fitted and the quick-release lever is secure in the closed position. Not all wheels will have quick-release levers. If the wheel is not quick-release, check that the nuts on both sides of the wheel are secure.
Spokes – Should be of equal tension and not loose. Pluck each spoke with your finger. The sound from each spoke should be very similar.
Tires – If the tire is soft, then attach your pump to the valve and pump up.
Note: There are two types of valve fitting – Presta (long and thin), and Schrader (thicker and slightly shorter). Recommended tire pressure is usually written somewhere on the tire.
Saddle – Check your seat post isn’t loose and that you haven’t exceeded the limit marked on the seat post. Once you have checked these, use an Allen key to tighten the seat post clamp. Check the seat is secure by giving it another check once you have finished.
Chain – Should be clean and oiled. Keeping your chain clean and oiled is important for the smooth running of your bike.
Note: Don’t use too much oil as this will pick up more dirt and make the chain more difficult to clean.
Pedals – Make sure they spin smoothly and that your cranks are on tight, spin smoothly, and don’t creak.
Stem – Check that your front wheel and stem do not move independently and that your handlebar clamp bolts are tight. Perform this check by standing in front of the bike, holding the front wheel between your knees, and twisting the handlebars. You can prevent any movement by tightening the stem bolts and the handlebar clamp with an Allen key.
Headset – Check if there is any rocking or clicking in the headset. Perform this check by firmly grasping the head tube with one hand and applying the front brake with the other hand. This will steady the front of the bike so that you can shake the headset to establish any rocking or clicking in the bearings.
Brakes – Ensure that the front and rear brakes are working properly. If the brake lever pulls against the handlebar grip, the brake cable needs adjusting. This is done by loosening the brake cable anchor bolt, pulling the cable tighter, and tightening the anchor bolt again. Both sides of the brake mechanism should move when the brake is applied. If this is not happening, turn the small adjuster screw on the stationary side until both sides are moving again. Most brakes have these adjuster screws. The brake block must pull flat to the wheel rim. If this is not the case, use an Allen key to tighten the block in the correct position. This is done whilst applying the brake. Finally, check the front brake by applying the brake and pushing the bike forwards, and check the back brake by applying the brake and pulling the bike backward.
Frame – Look for any cracks or damage. This check requires a particular focus on the area where the frame joins the head tube.
Front-wheel – It should be tightly fitted and the quick-release lever is secure in the closed position. Not all wheels will have quick-release levers. If the wheel is not quick-release, check that the nuts on both sides of the wheel are secure.
Again, this check earns its name because you follow the shape of an M when checking the bike, and should only take a couple of minutes. It should ideally be carried out before every ride to ensure your bike is safe.
Learn how to fix a puncture
There’s no sugar-coating it – punctures suck. Learning how to fix a puncture will mean you don’t have to call for help or a costly taxi home if you’re left deflated on the road or trailside.
At the very least, you should carry a spare inner tube with you on every ride, as well as a puncture repair kit.
A puncture repair kit is useful if you experience a second puncture and run out of tubes, so you can repair the punctured tube to get yourself home. It will also prove cost-effective, saving you from buying a new inner tube every time you get a puncture.
If you’re unsure how to fix a puncture, we’d recommend practicing the process before you head out for a longer ride.
Check your tire pressure
It’s worth checking your tire pressure before every ride. Riding with under-inflated or over-inflated tires is a common maintenance mistake.
Tires that aren’t inflated to the right pressure can change the way the bike feels. For example, if the tire pressure is too high, you’ll feel every vibration on the road and trail and if it’s too low, you run the risk of punctures and your bike may feel sluggish. In both cases, you will likely compromise the bike’s handling.
It’s a good idea to check your tire pressure before every ride and invest in one of the best bike pumps to keep them inflated.
If you’re unsure what pressure you should run, there will be a suggested range printed on the sidewall of the tire.
Keep your bike clean
Getting into a regular cleaning regime will work wonders for your bike.
Cleaning your bike will keep it running smoothly and reduce the wear on components, saving you from prematurely replacing parts or having to make extra trips to the bike shop. The muck, salt, and grit on the roads and trails will eat away at your drivetrain components if you don’t look after them.
While cleaning your bike may feel like a chore, it doesn’t have to be too labor-intensive. We’d recommend cleaning your bike at least once a week in the summer and after every ride in the winter.
Start by wetting the bike either using a bucket and sponge or a hose pipe. We’d recommend avoiding using a pressure washer because it can blast the grease out of the bearings.
Then clean the chain with a specific degreaser, which will normally take three to five minutes to work its magic.
While you’re waiting, you can clean the rest of the bike using a specific bike cleaner before moving back to the chain.
Once you’re done, dry the bike and apply chain lube to your chain to keep it running smoothly.
Learn how to adjust your brakes
Keeping your brakes clean and free of contamination will stop any unnecessary noises. Bike brakes perform a critical function and will lead to all kinds of problems if they’re not set up correctly.
If your bike has rim brakes, it’s worth keeping an eye on the pad life and replacing them before they’re worn out.
It’s also worth regularly checking the brake cable isn’t frayed and is under sufficient tension – the brake lever shouldn’t pull all the way back to the handlebar.
If your bike uses disc brakes, regularly inspect the disc brake pads to make sure there’s plenty of life left. It’s worth spraying some specific disc brake cleaner on the brake to avoid any contamination and squealing noises.
Index / Adjust your gears
You may need to adjust the indexing from time to time to stop them from mis-shifting or being excessively noisy.
Although there are many elements to adjusting the gears on your bike, being able to index them so they move from one cog to the next easily is a good foundational skill.
The indexing of your gears is performed using the barrel adjuster, which can be found either on the derailleur, shifter, or in-line in the cable housing. You’ll be able to solve most indexing problems by making adjustments to the cable tension.
If the chain shifts off the cassette or chainrings, you may need to adjust the limit screws. However, this won’t be the case most of the time, and should be your last port of call.
One general tip is to avoid resting your bike on its drive-side, where the derailleurs, cassette, and cranks are. This will avoid the derailleur hanger bending, which can lead to poor and inaccurate shifting.
Check your chain for wear
Catching a worn chain on time will save you money in the long run.
The chain experiences a heavy life and its pitch will grow in length over time. It’s worth investing in a chain checker and regularly checking for wear.
If you don’t change a chain in time, it will overstretch and then wear out the cassette and chainrings on the crankset, potentially making for a hefty repair bill.
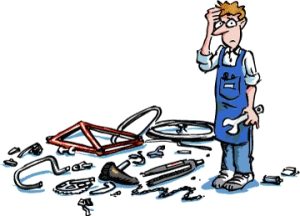
Fix a broken chain
Chains can break at the most inopportune time.
A broken chain doesn’t have to be a ride-ender if you’re carrying the correct tools and have the know-how to repair it.
If you’ve broken a chain on a ride and none of the links have bent, you can get yourself home by installing a new joining pin or quick link. It’s best to carry a multi-tool with a chain breaker function.
If some chain links are bent, you’ll need to shorten the chain. You may not have access to all of your gears, but you’ll be able to get home and ultimately replace the chain.
Attend a bike maintenance class
A maintenance class is a great way to improve your mechanical skills.
Attending a bicycle maintenance class is a great way to learn how to fix your bike.
Many bicycle workshops offer maintenance classes and the mechanic will likely be happy to answer your questions and offer you valuable information.